 |
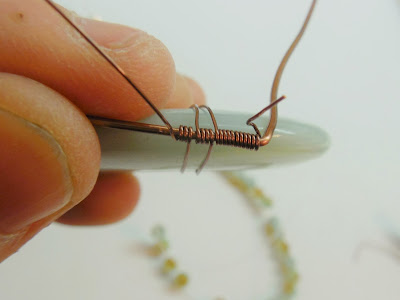
| Here I used 18 and 26 gauge enameled copper wire |
 |
| Begin by doing several wraps. This is your starting point and will be next to the base of the bail in the finished piece. |
 |
| The very beginning, when you are establishing what will end up being the pattern for the whole piece can be the most frustrating part of the process. Hang in there and stay with it. |
 |
| Here I am adding the first bead, then drawing the wire around the back to start the second go of the pattern. |
 |
| Here's a view from the top. |
 |
| As the pattern gets established, it is much easier to control the main wire and keep it centered along the edge. |
 |
| The pattern is taking on a distinct look, and the little sections of 3 are plain to see. |
 |
| The framing is done! |
 |
| Two little beads add a little extra emphasis to the base of the bail. |
 |
| I've begun weaving the bail. Instructions on how to do this weave are a a few posts back on the blog in a separate post. |
 |
| Here's another piece I did with the same basic technique. |
 |
| And another one! I hope you have fun working on your next donut shaped stone! |


2 comments:
Very cool! Thanks for the window into your process :)
Do you plan how many of the beads go around the donut and how many wraps between, or does it just work itself out as it goes along?
One of your biggest fans,
Shell
I never plan how many beads. I just hope for the best. If this had come out highly uneven, I would have used the two free wires in a design on the front to turn the accident into a deliberate design decision. Sometimes happy accidents occur. But that is the exception, not the rule. Most of my designs are the result of one little problem or another. I actually think asymmetry is what defines my look, so I don't give it a second thought. I just try my best to make a great design, making one decision at a time as I go.
Post a Comment