Wednesday, November 6, 2013

Easy Wire Wrapping: The Twisty Frame

In response to some terrible looking "easy" tutorials I have seen lately, I thought I would experiment. This twisty frame was so easy I was just delighted. This is a technique anyone can do well and still be creative with. So I hope if you have never tried wire wrapping before, you'll give this a try!

Two pieces of wire 15 inches or so, depending how big your stone is. I used 20 gauge.

Hold wires firmly in crossed position.

Begin twisting the wire, keeping the angle between the two wires. I found it is easiest to do half a twist at a time.

I used my finger to make the opening that the corner of the stone will sit in. But feel free to use anything you like. A dowel or pen will work well, too.

Continue on, twisting in the same direction as before. It is best to do this work only with your hands. No tools. Tools will very easily chew up the wire, making it look damaged. If you must use a pair of pliers, make sure the jaw is covered with blue painter's tape to cushion the jaw, or use nylon jaw pliers.

Here, the second opening is made. I made a rough guess with the stone close at hand, figuring the fit could be adjusted once the stone is in the frame.

       There it is! The twisty frame! All ready to insert the stone.                                                                                                    
Okay, so the stone is in. As you can see, the fit isn't very good. The great part about this frame with the open pockets for the corners is that you can work with it on the stone and adjust the fit. Again, I suggest you not use tools for this. It takes some patient wrangling. But the results will be better.


About ten minutes later, I have a much better fit. Notice at the top where I have extra twisted wire. That ended up making it difficult to for a tidy bail. If I had started out with only a few twists, and likewise, ended with only a few twists, the wires would have come together at the top more easily. Take that into consideration when you make your own twisty frame pendant.

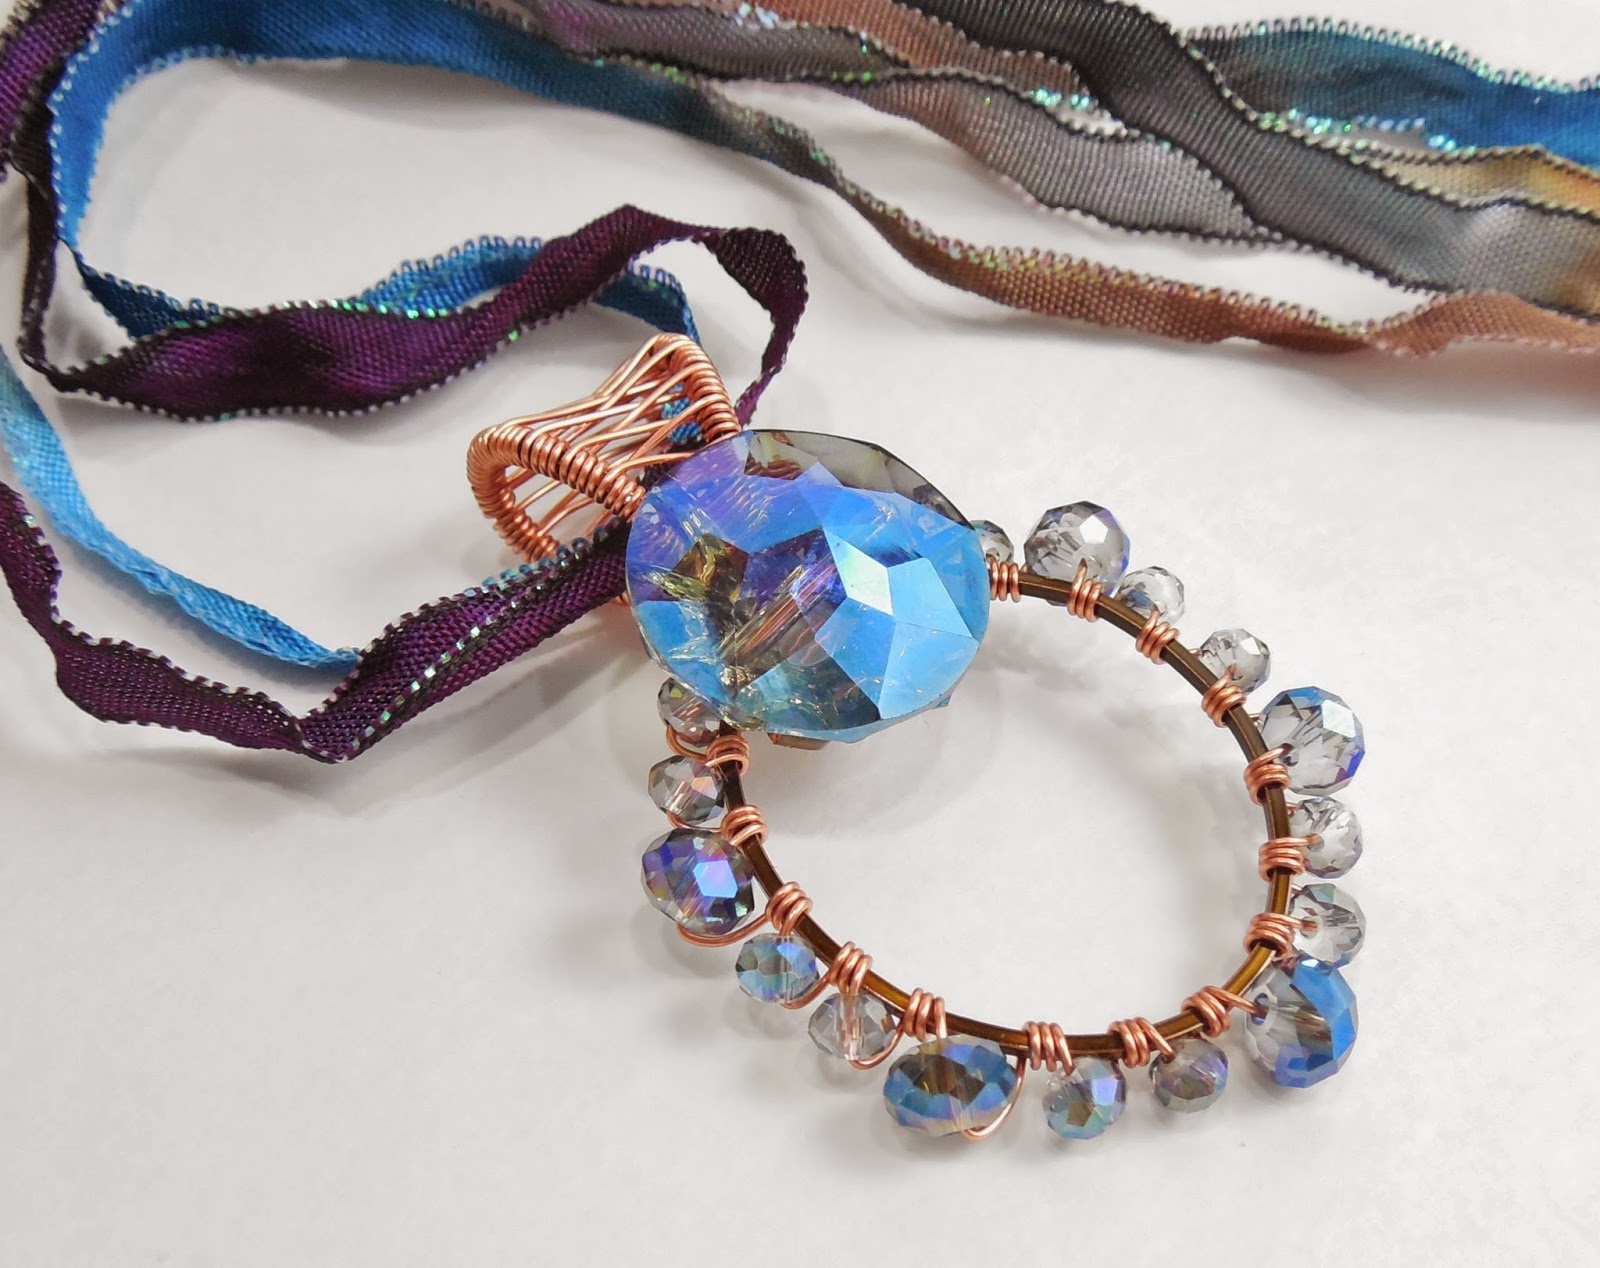
Here's the finished pendant. The bail didn't turn out well. So, I covered it with spirals made from the loose ends.

Here's a nice shot of how the corner of the glass fits right in the open pocket.

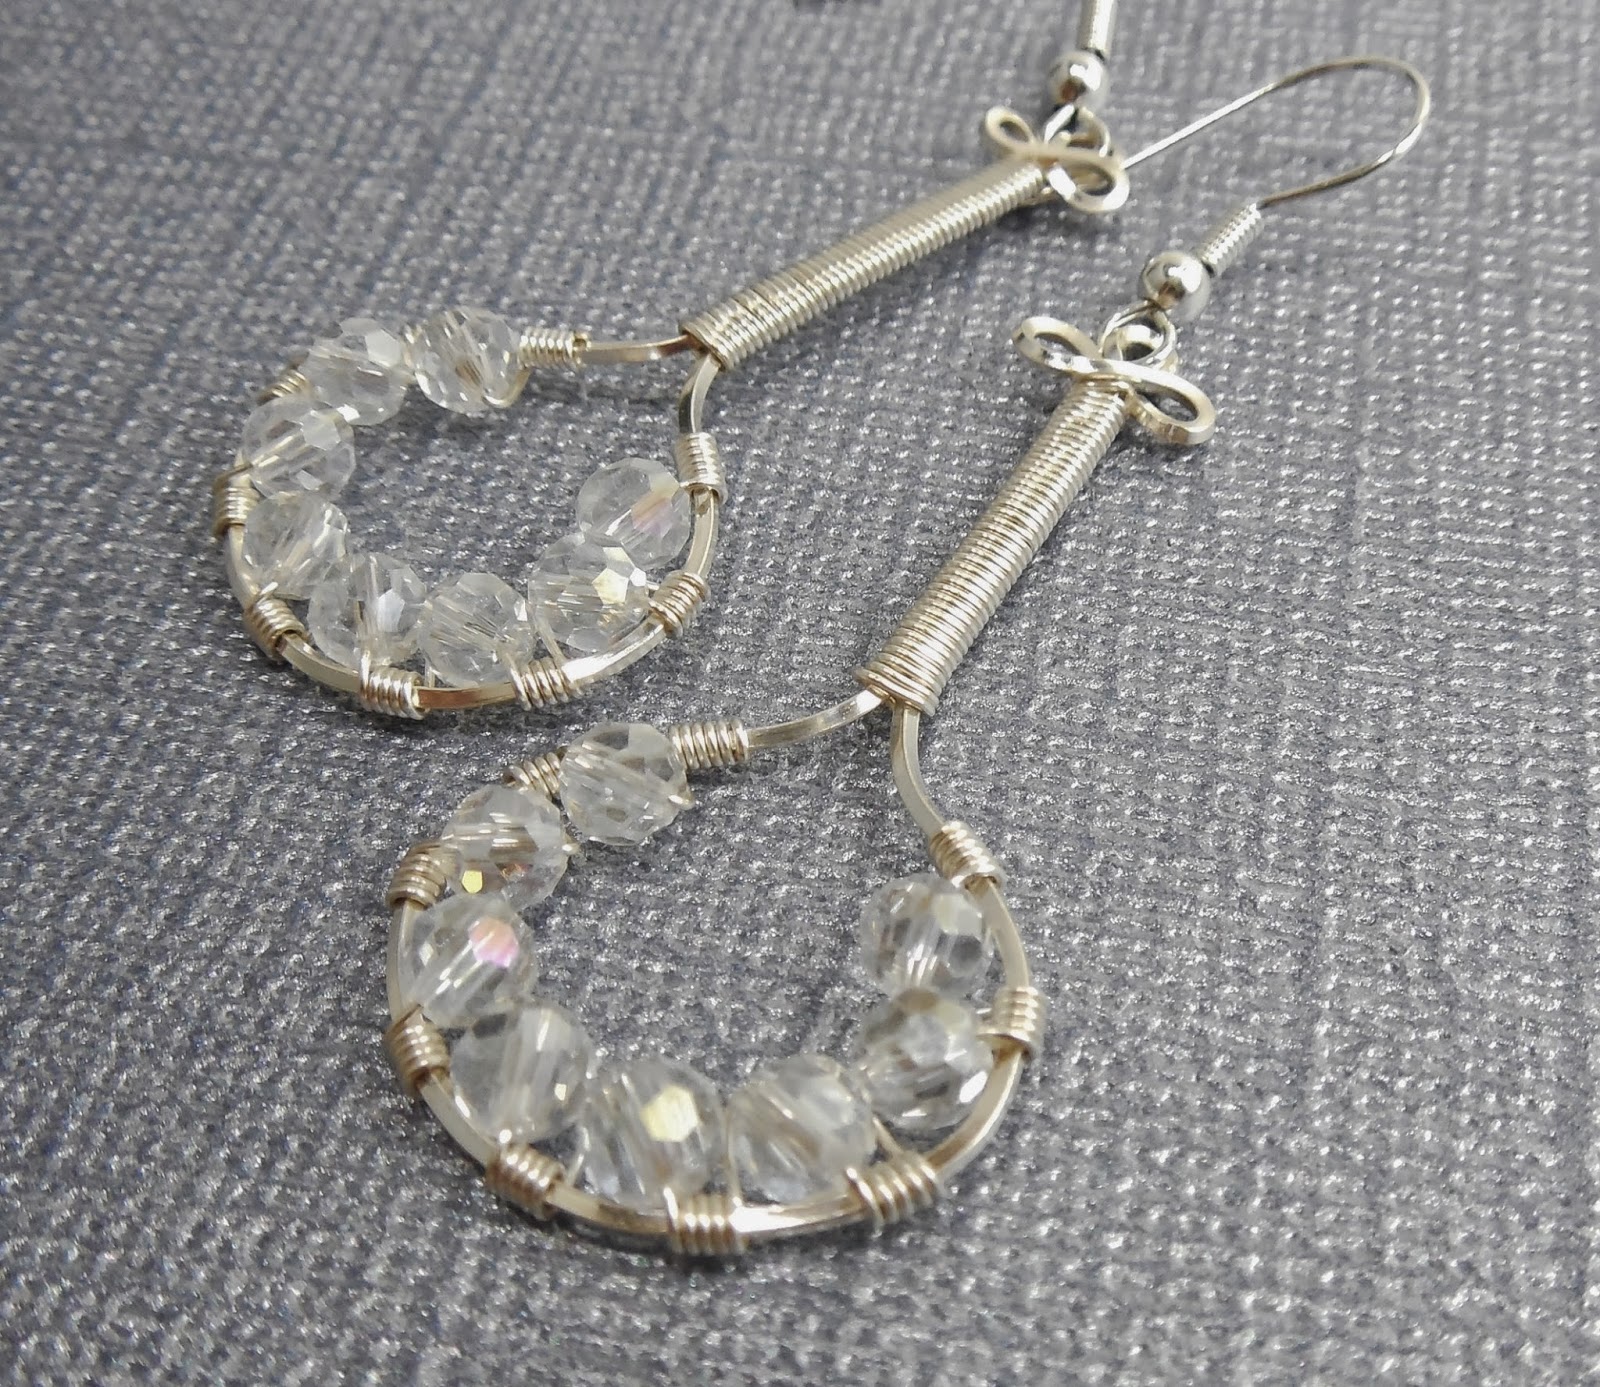
Here's another variation.


And another...

Here I made a large loop where the pocket should be, and twisted all the way to the top. I was able to do that because the stone is top drilled. I covered there I anchored the stone in place with a spiral. Using one of the free wires to go across the whole stone and around to the back gave it even more stability. This isn't the most perfect piece I have ever made, but I think it shows some of the possibility of how the technique can be used. I hope you all have fun and play with this easy framing technique!

Thursday, October 17, 2013

Making a Custom Piece of Jewelry

This is a custom pendant I made where the client wanted very specific things. He wanted a soft purple stone, in a medium size set in silver for his wife to celebrate their anniversary. I will show you here how I created the stone for this beautiful pendant.
This is the beautiful finished piece.

Here are the chunks of Tiffany Stone (Bertrandite) rough before cutting.

After grinding off excess  material on a diamond wheel, I now have the preforms for the cabochons. The the short wooden dowels will be used to support the stones while I am working them into cabochons. Here you see what is called the Dop Pot. It  is heating the hard green wax that will hold the stones on the dowels, called Dops. The stones also must be heated for the wax to fuse to the back of the stone. They get very hot laying on the rim of the dop pot.

Once the wax is melted and the stones are hot, I dip the dop stick into the wax. Then immediately affix to the back of the hot stone. They are left face down to cool before grinding can begin.

Here are the stones on the dop sticks ready to cab.

On my cabbing machine there are six grinding and polishing wheels, from left to right, the coarsest to the finest. The first two wheels remove most of the material so you can rough out the basic shape of the cab, the next two wheels are where you can refine the shape and remove any little scratches on the stone. The last two are polishing wheels. All grinding is done wet. Without the water, the diamond coating on the wheels would heat up and burn off, rendering the wheels useless. There is a pan of water with lubricant underneath, and a tube attached to a little geyser that shoots lubricated water up onto the wheel I am working on.

Here are the nearly finished cabochons, still attached to the dop sticks.

I place the dopped cabs in the freezer for five minutes. Cooling the stone helps break the bond between the wax and the stone, so the sticks and wax release easily.

Here are the extra pretty finished Tiffany Stone cabochons.

Now, to make the pendant. These are the basic tools I use in wirework.

I start by weaving a bezel for the stone.

The most important part of any wire design is getting an exact fit of the bezel or frame to the stone. I lay the stone on a flat surface, and work the wire on on the stone until I am satisfied with the fit. Then design the rest of the piece from there.

Here is the beautiful finished piece!

Friday, October 11, 2013

More Easy Beads with Wire!

These were parts just to show what the contrasting wire looks like with the beads

I considered this design for the class. I love all the copper!

I took macro video of the making of this pendant for use in my classroom. The students found it helpful to glance up and see the technique up close on the screen while they were working on theirs.

This is a statement piece using thick wire and jumbo beads.

I used the same wrapping technique adding three beads instead of one at each interval. I used highly contrasting wires and very soft colored beads.

Another variation using Czech fire polished crystal

Here, I demonstrated the technique using two different sizes of beads.

Using the beads on the inside of the design gives a totally different feel, as does the thin 28 gauge wire which gives this design a delicate silky look.

Very simple bangle design using 16  and 24 gauge wire. I hope you all enjoy experimenting with this beads and wire technique! I'd love to see what you do with it! Have fun :-)


Intro to Wire Wrapping: Adding beads to a simple design.

Some pics of the main techniques we used in last  Saturday's class!I hope you try this out and find all kinds of great ways to use this technique!
Begin wrapping, keeping each wrap as close to the one next to it as possible. I do this in two strokes. One, straight up, bend the wire over the top, and one stroke down, then bend the wire over the bottom, and so on. This helps the wire consistently lay parallel on the main wires.
Add the number of beads you wish to use to your wrapping wire.

Make a knot of sorts on the end, so that the beads don't come flying off as you go along wrapping wire and adding each bead.
Once you have several wraps, add your first bead. The bead should rest atop the main wires. Holding the bead in place, bend the free wire downward around the back, and continue wrapping five more wraps.

When you have wrapped five times, and the next bead on the 6th. Repeat and continue.

Periodically, stop and use your flat nose pliers to gently squeeze the sections of six wraps together, and make any adjustments to spacing you need to make. Do this as you go. If you wait until the end, it will be much more difficult to make minor adjustments and corrections.
Once you have the amount of pattern beaded wire wrapped you want for the design, add in the top drilled pendant bead. Use your free wire to string the bead on. lasso the wire around the outside of the opposite side wires, then run the free wire back through the pendant bead to attach. I have flossed the lasso wire a little higher than mid point on the left. Once you pull the wire back through the stone, pull tight, and continue wrapping until the two sides are even. Then trim the ends and tap down any sharp ends that may be sticking out.

Using a little dowel rod, a pen, or any other round object, form the wire  for the bail around it, and keep in place while you secure the bail, either with the main wires or more of the wrapping wire. I knew I wanted a very simple design here. So, I used the same main wires to wrap around the bail wires.

Here we have the finished piece! This is a fun, easy bead on wire technique. I hope you all have fun experimenting with it in your jewelry designs!

I'm SO sorry! And THANK YOU!

As most of you know by now, I don't post very often. I am very busy, but that's not really a valid excuse. I visited the blog because I was going to post pics from the last class I taught and pointers on one of main techniques in the class. Well, then I saw that I had 47 comments that need moderation. I am SO sorry it took me so long to read your comments. But, THANK YOU for every one of them. I am glad to know that what I share here is helping others. I really appreciate the support. Knowing that people are actually reading my blog helps me to know I should post more often. And, I promise I will. Stay tuned!

Wednesday, April 10, 2013

Live Class Online TONIGHT!!!!
Join me tonight  at 8:00 PM Eastern Time and learn how to make this pendant. It doesn't matter where in the world you are. This class is live online! Register here!
http://www.craftcast.com/class-item/1482313-whimsical-wire-weaves-how-to-successfully

You will learn how to make this pendant and how every detail of it is done. I will talk about wire types and gemstones. And, also how to troubleshoot as you are working on a piece of jewelry. If you are interested, but happen to miss the class, the recording will be available for purchase about a week from now, here: http://www.craftcast.com/recordings

All call participants will receive the class recording and class handout, free.
Hope to see you all in class!


Tuesday, August 21, 2012

Lapidary...more to come

As many of you know, I've been cutting my own stones for about a year and a half. I have been just pitiful about posting to my blog. But, I haven't completely forgotten about it. I have much to share. There's a shot of my Diamond Pacific Pixie, fresh out of the box back in January. And Nigel wants in on the action, too. Stone cutting has been in full swing for many months now in my new space, and everything is covered with grime. The jeweler's benches are in place. The last piece of the puzzle is the installation of ventilation, and fuel for the torches! Stay tuned....